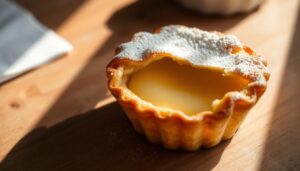
My culinary journey took an unexpected turn during a summer trip to Lisbon. There, I first discovered the magical world of Portuguese custard treats. The moment I bit into a gortidas de nata recipe, I was transported by its delicate, creamy texture and rich flavor.
As a passionate home baker, I knew I had to master this Portuguese custard treat. The challenge of recreating these delicate pastries became my delicious obsession. Through countless experiments and research, I developed a foolproof recipe that captures the essence of authentic Portuguese baking.
This gortidas de nata recipe is more than just a dessert – it’s a culinary adventure. It brings the warmth of Portuguese kitchens right into your home. I’m excited to share every detail that will help you create these incredible pastries from scratch.
Key Takeaways
- Authentic Portuguese dessert with rich cultural heritage
- Easy to make with simple ingredients
- Perfect for sharing with family and friends
- Takes only 35 minutes total to prepare
- Can be customized with alternative ingredients
What Are Gortidas de Nata?
Exploring Portuguese culinary wonders, I’m thrilled to share the story of gortidas de nata. This Spanish dessert has a deep Portuguese influence, spanning centuries of tasty tradition.

The history of these tasty pastries goes back to Lisbon’s Jerónimos Monastery. Monks created the first recipe, which became a treasured tradition after monasteries shut in the 19th century.
A Culinary Journey Through Time
Gortidas de nata are more than a sweet treat. They tell a story of Portuguese culinary traditions and European dessert-making.
- Originated in Lisbon monasteries
- Developed by skilled monk bakers
- Became popular after monastery closures
Understanding the Name
The word nata means “cream” in Portuguese. It shows the creamy nature of these pastries. This dessert combines Spanish roots with Portuguese baking traditions.
| Origin | Cultural Significance |
|---|---|
| Lisbon Monasteries | Culinary Innovation |
| 19th Century | Preservation of Baking Traditions |
I find gortidas de nata fascinating. They tell a story through flavor, showing Portugal’s rich culinary history.
Ingredients Needed for Gortidas de Nata
Making the perfect gortidas de nata begins with choosing the best ingredients. My love for authentic Portuguese pastry makes me eager to share the key ingredients. These make this treat truly special.

The heart of any great pastry is its egg yolk custard and pastry cream filling. Let me explain the essential ingredients you’ll need to make these treats.
Essential Ingredients for the Custard
The foundation of an exceptional gortidas de nata lies in its carefully selected ingredients:
- Fresh egg yolks (crucial for rich, creamy custard)
- Granulated sugar (1/2 cup for perfect sweetness)
- Whole milk (creates smooth pastry cream filling)
- Cornflour (helps thicken the custard)
- Unsalted butter
- Plain flour
Optional Ingredients for a Personal Touch
To elevate your gortidas de nata, consider these creative additions:
- Cinnamon stick (for warm, aromatic flavor)
- Lemon peel (adds a bright, citrusy note)
- Vanilla extract (enhances overall sweetness)
| Ingredient | Quantity | Purpose |
|---|---|---|
| Egg Yolks | 4-5 | Creates rich custard base |
| Sugar | 1/2 cup | Provides sweetness |
| Milk | 2 cups | Ensures creamy texture |
My secret to perfect gortidas de nata is using the freshest ingredients. I focus on each component’s role in creating that signature creamy, delicate flavor.
Preparing the Pastry for Gortidas de Nata
Making the perfect traditional pastries needs care and patience. My journey to master gortidas de nata started with learning how to make the perfect puff pastry. It’s all about the technique and keeping the temperature right.

Let’s go through the key steps to make this lovely traditional Portuguese pastry. First, you make a butter block and then fold the dough to get those flaky layers.
Essential Dough-Making Techniques
Here’s my reliable way to make the perfect pastry base:
- Start with high-quality, cold unsalted butter (195g total)
- Use precisely measured plain flour (265g)
- Make sure all ingredients are at the right temperature
Mastering the Folding Process
The secret to amazing traditional pastries is the folding technique. Here’s how it works:
- Create a butter block by rolling cold butter between parchment paper
- Fold the dough multiple times, creating multiple layers
- Chill the dough for 20 minutes between each fold
| Technique | Key Considerations |
|---|---|
| Butter Temperature | Must be cold but pliable |
| Folding Technique | Minimum 3-4 turns for optimal flakiness |
| Resting Time | 40 minutes total chilling time |
Pro tip: The magic of traditional pastries is in keeping everything cold and handling the dough minimally. Each fold creates those beautiful, delicate layers that make gortidas de nata truly special.
Making the Custard Filling
Creating the perfect custard tarts is all about mastering egg yolk custard. My journey into Portuguese pastry-making showed me the secret to gortidas de nata’s silky smooth filling. It’s all about combining simple ingredients to create something truly special.

Here’s what you need for a velvety custard that will delight your taste buds:
- Fresh egg yolks (the secret to richness)
- Whole milk (150ml for perfect consistency)
- Granulated sugar (225g for sweetness)
- Cinnamon stick
- Lemon zest
Crafting the Perfect Custard Texture
The secret to amazing custard tarts is in the cooking method. I slowly add warm milk to the egg yolks to avoid scrambling. This makes the custard smooth. The cinnamon and lemon add a subtle, complex flavor that takes the dessert to the next level.
Cooking Techniques for Silky Smoothness
When making egg yolk custard, patience is key. Here’s what I do:
- Whisk egg yolks with sugar until pale and creamy
- Gradually add warm milk with cinnamon and lemon
- Cook over low heat, stirring constantly
- Strain the mixture to remove lumps
Pro tip: The custard should coat the spoon and leave a clean line when you run your finger through it. This means it’s the right thickness for your gortidas de nata.
Assembling Gortidas de Nata
Making traditional pastries like Gortidas de Nata needs careful assembly. It’s all about turning simple ingredients into a delicious treat. This treat will surely impress your family and friends.

I’ll show you how to put together your pastry and pastry cream filling perfectly. It might seem hard at first, but you’ll get the hang of it soon.
Layering Your Pastry and Custard
To make the perfect Gortidas de Nata, follow these steps:
- Roll your pastry dough into a smooth, even sausage shape
- Slice the dough into thin, uniform discs
- Gently press each disc into prepared tins
- Ensure even distribution of dough for a crispy exterior
Preparing for Baking Perfection
When adding the pastry cream filling, be precise. Use a small ladle or piping bag to spread the custard evenly. Fill each pastry shell about three-quarters full to avoid overflow during baking.
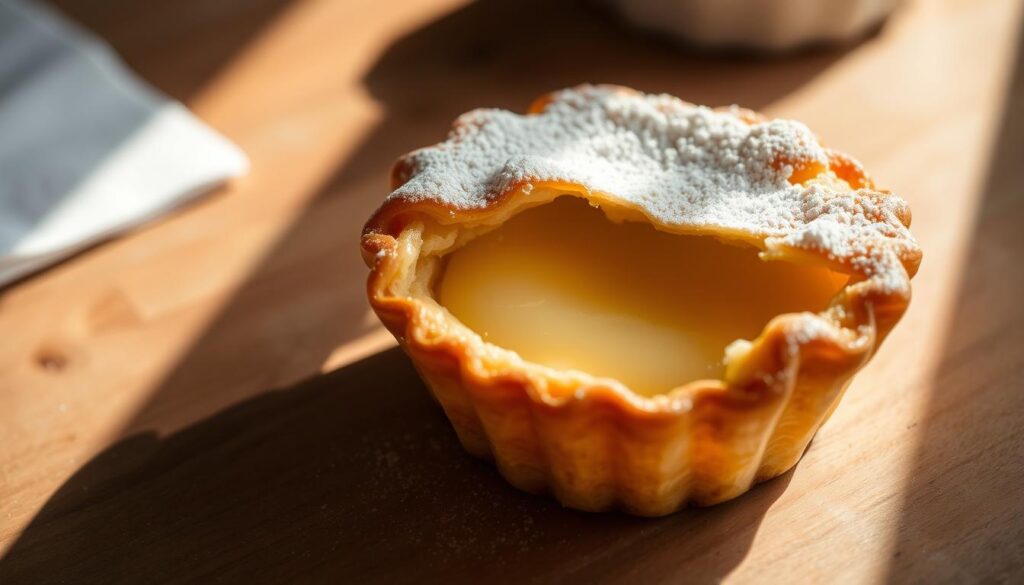
The goal is to balance the crisp pastry with smooth custard. Your Gortidas de Nata will have a beautiful caramelized top. It will make everyone’s mouth water.
Baking Instructions for Gortidas de Nata
Getting the baking right is key to making great gortidas de nata. The right steps turn simple ingredients into a magical Portuguese treat that’s creamy and melts in your mouth.
Creating gortidas de nata needs precision and attention to temperature and timing. I’ll show you the baking steps for that perfect crispy outside and creamy inside.
Optimal Oven Temperature
To make the best gortidas de nata, preheat your oven very high. The best temperature is:
- 260°C (500°F) for conventional ovens
- 240°C (475°F) for fan-assisted ovens
- Gas mark 8
Precise Baking Technique
The baking of gortidas de nata has two important parts:
- Initial baking: 5-8 minutes to cook the pastry
- Caramelization: 1-2 minutes under the grill
My top tip for a true Portuguese taste is to watch the caramelization closely. The top should look golden-brown and slightly burnt.
Indicators Your Gortidas Are Ready
Knowing when your gortidas de nata are done takes practice. Look for these signs:
- Golden-brown, bubbling surface
- Slight charring around the edges
- Crisp, flaky pastry shell
- Creamy custard that jiggles slightly when moved
Remember, every oven is different. So, don’t worry if it takes a few tries to get it right. Practice makes perfect!
Tips for Serving Gortidas de Nata
Serving Gortidas de Nata is an art that turns a simple pastry into a delightful treat. These Portuguese treats deserve special care when you serve them to friends and family. The magic starts with careful preparation and thoughtful presentation.
When serving these tasty pastries, follow these key tips to enjoy them fully:
- Dust the Gortidas with powdered sugar just before serving to enhance their visual appeal
- Serve at a warm temperature of around 30°C (86°F) for optimal flavor
- Pair with a rich, strong coffee or hot chocolate
- Present on a beautiful ceramic plate to elevate the dining experience
Perfect Pairings to Elevate Your Experience
The right drink can make your Gortidas de Nata unforgettable. I love pairing these pastries with drinks that match their creamy texture. A traditional Portuguese espresso is perfect, balancing the sweetness with its strong flavor.
| Beverage | Flavor Compatibility | Recommended Serving Temperature |
|---|---|---|
| Espresso | Excellent | 65-70°C |
| Hot Chocolate | Very Good | 60-65°C |
| Port Wine | Good | 16-18°C |
The Joy of Sharing Gortidas
Sharing Gortidas de Nata with loved ones is magical. Dusting powdered sugar over these pastries and seeing people’s faces light up creates lasting memories. Culinary traditions are best experienced together, and these treats bring people closer.
Pro tip: Always make a few extra Gortidas. They’ll disappear faster than you think!
Storage and Shelf Life
Keeping gortidas de nata fresh is key. After making your gortidas de nata, you’ll want to keep them tasty and fresh.
- Room Temperature: Store in an airtight container for up to 2 days
- Refrigerator Storage: Wrap tightly and keep for up to 5 days
- Freezer Option: Store for up to 2 months if sealed well
Proper Storage Techniques
To keep your gortidas de nata perfect, follow these tips. Use a container that seals well to keep moisture out. Add a paper towel to absorb any extra moisture that could make the pastry soggy.
Reheating for Maximum Enjoyment
Reheating your gortidas de nata is easy. Try these methods:
- Oven Method: Warm at 350°F (175°C) for 5-7 minutes
- Microwave Method: Heat for 10-15 seconds
Pro tip: The oven method makes the pastry crispy again. The microwave is quicker. Always check to avoid overheating, which can dry out your treat.
Variations of Gortidas de Nata
Exploring new twists on Spanish desserts is exciting. My adventures with gorditas de nata have led me to try unique flavors. These flavors mix Spanish and Portuguese traditions.
These pastries are very versatile. Here are some tasty variations I’ve found:
- Chocolate Infusion: A rich twist that adds depth to the classic recipe
- Fruit-Inspired Versions: Cherry and berry variations that bring vibrant flavors
- Spiced adaptations with cinnamon or nutmeg
Creative Flavor Twists
At the annual chocolate festival in Óbidos, I saw chefs trying new things. My favorite is a chocolate-infused version. It honors Portuguese traditions but also adds a modern twist.
Dietary-Friendly Alternatives
Everyone should get to enjoy these treats, no matter their diet. I’ve made gluten-free and vegan versions that keep the original Spanish dessert’s spirit:
- Gluten-free flour blends
- Plant-based butter substitutes
- Egg replacements like aquafaba
It’s all about mixing old techniques with today’s dietary needs. Whether you’re on a diet or just want to try new tastes, these options will please your palate.
Why I Love Making Gortidas de Nata
My adventure with this Portuguese custard treat started by chance. I found the recipe while exploring cooking, and it quickly won my heart. The mix of flavors and textures is perfect. Making these pastries is more than cooking; it’s a passion that connects me to Portuguese traditions.
Mastering the Portuguese custard treat was tough. My early tries were messy and hit-or-miss. But every mistake taught me something new about cooking. It’s about knowing your ingredients and mastering the process.
Sharing these gortidas with loved ones is the best part. Seeing their joy when they taste the creamy, caramelized treat fills me with happiness. It’s not just about the food; it’s about the memories we make together.
My kitchen is now a place where I can try new things and get better. Every batch of gortidas is a celebration of cooking. It shows me why I love cooking: it’s a way to share love, culture, and the joy of making something special from scratch.